Showing posts with label @Accuquilt. Show all posts

Friday, November 10, 2023

Tree Skirt Tutorial

 Accuquilt was kind enough to send me the tree skirt wedge die to do a tutorial here on my blog. I love how this tree skirt came together quickly. Follow along with me...


You will need this Tree Skirt wedge die from Accuquilt. 


Pick 4 fabrics each measuring at least 21" x WOF(width of fabric).


With accuquilt dies you can cut up to 6 layers of fabric at a time.  For this particular skirt I am only cutting 2 layers at a time, (the next photo will show you why I had to do that). Layer two fabrics over the die.


Here is why I did two layers... I rolled the excess fabric up so it would lay next to the die when going through my GO!  All 4 layers wouldn't fit through.


Here is the first two wedges cut, easy peasy, right?  You might notice my black sharpie lines I have drawn 1/4" away from the blades on the die. These are my guidelines for lining up my fabric so I am sure that my fabric covers the blades.


Here is an important step, to save yourself fabric be sure to flip the fabric and cover the wedge again and cut. Keep flipping and cutting until you have 5 from the first two fabrics. Repeat with the second set of fabrics. 


You need five wedges of each fabric for a total of 20 wedges.


Arrange your wedges in the order you like and sew together in pairs using 1/4" seams. Then sew the pairs into sets of four. Continue sewing these all together until you have a complete circle. The tree skirt measures 45" in diameter when finished.


Layer your backing, batting and tree skirt and quilt it.  After quilting I cut down one seam for the opening so you can wrap this around your tree.  


After quilting iron fusible web of your choice to wrong side of white fabric for snowman face. Cut four   9" circles and fuse to the edge of skirt letting some of the circle hang over the edge. Applique the face using your favorite method.  I used black thread and the blanket stitch on my domestic machine. Trim off the edge of face that hangs over the skirt. Add a nose and buttons for eyes.  Bind your tree skirt with bias binding, add a ribbon tie in the binding seam.  You now have a festive looking tree skirt.  There is still time to order the die and make your tree a new skirt this Christmas!  


I hope you have enjoyed this tutorial! Thank you Accuquilt for the tree die.


Accuquilt sale on 11/11/23---FLASH SALE! -- Extra 25% off (use code: TEXT25).

Also through the 13th--- 55% off Studio Dies and Die Bundles (use code: STUDIO55)

Linking with Can I get a whoop whoop, Finished or not Friday, Friday Foto fun, Peacock party, TGIFF, Off the wall Friday, Beauty Pageant


Friday, February 10, 2023

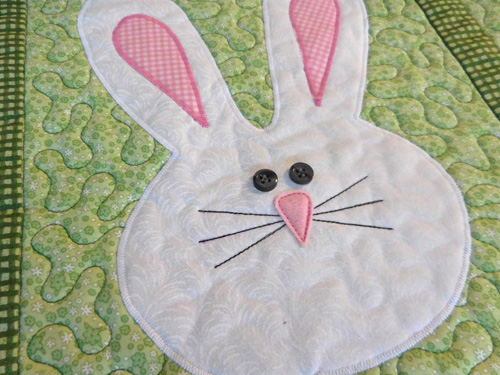
Sweet bunny love

Down the rabbit hole I went again😀.  These cute little guys have stolen my heart.  I can see them in all different color ways. But I kept it to only two for these finishes. 


Just imagine this bunny hopping around in the green Easter grass. The gingham might represent the fence and he's such a good little bunny staying inside the fence. 


The next color was a pretty purple, and man was it hard to photograph! It kept coming out blue instead of purple. I asked my hubby for ideas of how to make it more true to the color. He came up with shining a red light at it while I shot the photo and it worked!  The purple might be a field of lavender or lilacs that the bunny is frolicking around in. Both of these have the same backing fabric. 


I have also started a little baby quilt in order to try out the Hunter Star Accuquilt die.  Now I have used other methods of making a hunter star and I thought they were great. However now I am totally liking the Accuquilt die. Everything lines up so nice and it is easy to sew. No Y seams.  You make four 6" blocks and join them to make a 12" block. There are four blocks here. I am thinking I'll do nine blocks for a 36" quilt and maybe add borders. We'll see, I'm just playing and enjoying the process with no hurry to get it done. 

And to get out of the sewing room a bit here and there I have been putting puzzles together this month. A friend loans me a few at a time. This hummingbird is a whole different kind of puzzle than I am used to. The only ones I have ever done are square or rectangular and this one is just the hummingbird attached to the flower with only his beak! The brown is my card table. 


From 2/9-2/13 Accuquilt is offering $536 off Ready Set GO! cutting system (use code: RSGSAVE) and 2/11-2/28 is their SEMI-ANNUAL SALE! -- 70% off Clearance Items (while supplies last) If you use these links I will receive a small commission as an affiliate. 


Thursday, January 19, 2023

Pink heart-squirrel

I have never joined in the Project Quilting but was prompted by Wendy so after looking up the rules I decided to join in the fun this week.  You must create and totally finish something pink with three layers sewn together. It just so happens I have one of those!! 

This was a squirrel for me, the idea was born, I didn't have anything specific I needed to do Monday so I got right to work on it. Thank you @Accuquilt for providing the 2, 3,and 4" heart die. The red fabric was fused with Heat n Bond Lite before I ran it through the die cutter. I used two hearts of each size and with one pass I was ready to applique! 


By Tuesday afternoon my table runner was finished. I love it!!  


I tend to quilt my piece and then applique it. It just is easier and I get better results that way as the quilting stabilizes the piece. 
   

I hope you will come back tomorrow as I have a new pattern launch!!  A little sneak peak:)


Linking with:


Sunday, January 8, 2023

A little Scrappy UFO


In the closet with the rest of my UFO's I found these 8.5" square strip blocks. And get this, I even had left myself a little drawing of what these were for, LOL.  Seriously I need to do this more often as I pulled out several other UFO's that had no notes, that is frustrating. 


The plan was to snowball the corners with 2.5" squares. I even had the background fabric stored with these blocks!


I was able to quickly cut my background squares with the Accuquilt multiple 2.5" square die. At six layers thick I cut 54 squares in one pass.  After that I finished a couple blocks to see how they would look.


The next day I whipped through the green and gold and here is what I have so far. Oh how good it feels to work on a scrappy UFO!


The machine knitting of hats continued through out the week, here are the results of that.


Linking with Oh Scrap, Design Wall Monday, Sew and Tell Monday and This and That

Friday, January 6, 2023

A quick baby quilt

 After purchasing this Accuquilt tumbler die I was anxious to try it out. It is the 4 1/2" tumbler and perfect for a baby quilt. For this quilt I chose the focus fabric first which is the tractor fabric and then picked solids to coordinate with it. 


What little boy wouldn't be thrilled to have a quilt with tractors!  It went together so easily using this die because the corners are cut, so you just line the fabrics and chain sew and it comes out great!


I had the perfect backing fabric in the stash, I also used it for the binding. I was just a bit short because I didn't cut quite enough binding so I added a red zinger scrap to finish it off. You can see that in the first photo and in this one.  This quilt was sent with my DIL last weekend along with the hats. This was finished up in the weeks leading up to Christmas.


It would seem that Accuquilt is always having a sale. Through January 9, 2023 they have 20% off Go! Die Bundles. Did you see that the January Die To Try is a pieced canning jar. If you click on Accuquilt link and purchase something I get a small commission at no extra charge to you.


Linking with: Whoop Whoop, Peackock party, TGIFF, Finished or Not Friday.

Sunday, December 4, 2022

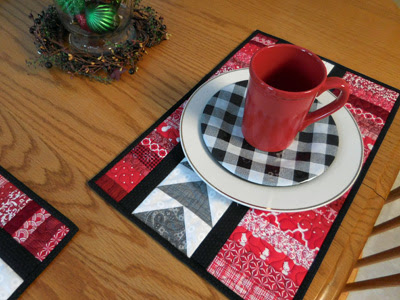
Scrappy Placemats

 I had a little free time today to quilt and bind these scrappy placemats.  


I pieced these back in January-February area using red scrappy strings all different widths. And 2"x 4" finished flying geese units in gray, accented with black 1" finished black strips. Accuquilt 8" cube dies #4 and #5 for the geese and the 1.5" strip die for the black.  

They would look festive for the holidays but could be used at any time of the year.  I could see these in lots of color ways. 


For the backing I used this fun Santa face fabric that I found in the stash.